Mastering Machine Embroidery on Stretchy (Knit) Fabric
This post may contain affiliate links, which means I’ll receive a commission if you purchase through my links, at no extra cost to you. I sometimes receive free products for review. Please read disclosure for more information.
While embroidering stable, woven fabric is a breeze, machine embroidery on unstable, stretchy fabric requires more knowledge, expertise, and troubleshooting.
Especially if the fabric is lightweight, loosely knitted, or super stretchy. These knits stretch in the hoop and shift around if not prepared perfectly, which leads to ugly embroidery.
However, don’t be too scared! If you carefully choose your stabilizer and supplies and take care when setting up your project, you have a good chance of success.
Thus, here are some tips for machine embroidery on stretchy fabric, including troubleshooting if the results weren’t quite what you hoped!

Types of Knit Fabrics & Effect on Embroidery
There are many varieties of knit fabrics, and each requires different supplies and machine settings.
For instance, there are two-way stretch knits and four-way stretch knits. Some knits are super stretchy, like Spandex fabric, and others like double knit fabrics stretch significantly less.
There are lightweight knits and heavyweight knits. Some knit fabrics have a loose weave of bulky yarns, while others are tightly woven with thin yarns.
There’s no one-size-fits-all answer to how to embroider stretchy fabric, so let’s learn how to make decisions for your project based on fabric and design characteristics.
Machine Embroidery on Stretchy Fabric: Considerations

Here are different choices you have to make. Plus, how to choose what you need to get the job done the right way the first time!
1. Stabilizer Selection
There are four primary stabilizers: tear-away, cut-away, wash-away, and heat-away. These types also have fusible or sticky varieties and come in various weights.
A. Type of Stabilizer

For stretchy knit fabrics, you need to use cut-away stabilizer to best support the embroidery design.
For lighter-colored shirts or lighter-weight knit fabrics, no-show mesh (PolyMesh) stabilizer is a lightweight cut-away type with less show-through.
No-show mesh stabilizer is also softer and more pliable than cut-away, which is essential for maintaining the drape of lightweight stretch fabric.
As a rule, stay away from using tear-away stabilizer for stretchy fabrics.
Even if you have a good stitch-out with tear-away or wash-away, a big problem is it is not permanent. Thus, the stretch fabric, once washed, is more likely to result in a curled or distorted embroidery design as the support is no longer there.
One exception is embroidering a tiny logo or design (like a single-color Adidas logo) on knitted fabric. You can usually opt for a wash-away or tear-away stabilizer in these cases. My favorite is Exquisite Tear ‘N Wash, which tears and washes away any residual.

I also recommend water-soluble topping if the knit is “squishy,” as in stitches may tend to sink into a looser weave of fluffier yarns. This can be hooped with fabric or secured on top right before embroidering.
And lastly, if the stretch fabric is to be worn (shirts, leggings, swimsuits, etc.), fuse backing (like Tender Touch, Cloud Cover, or your favorite Tricot fusible) over the back of the design to keep it from scratching the wearer.
B. Weight and Amount Of Stabilizer
A heavyweight stabilizer on a lightweight fabric will affect the drape of the fabric after it’s embroidered, so it’s important not to use too thick of a stabilizer in situations like this.
And, a properly digitized design should need only one layer of stabilizer on a compatible stretchy fabric.
However, if you need to layer stabilizers, you can. Just place layers of no-show mesh perpendicular to each other for the best results.
C. Fusible Options and Things that Make Hooping Easier

Minimizing fabric stretch before hooping is helpful, which is why I prefer using fusible cut-away stabilizer or no-show mesh on fabrics that can tolerate heat.
An alternative is using temporary fabric adhesive (like Odif 505) to keep the stabilizer and fabric together while hooping. This also keeps the fabric and stabilizer together in the hoop until the underlay stitches tack the fabric down permanently.
Yet another option for very stretchy items that are difficult to hoop is to fuse Tricot interfacing (like Pellon EK130 Easy-Knit) to the back of the fabric first and then secure it in the hoop with stabilizer. Again, only fuse to heat-tolerant fabrics, and make sure this won’t affect the fabric’s properties too much.

A final recommendation is using spray starch, Best Press, or even Terial Magic for stiffening fabric to provide more stability during the embroidery process. These are also my favorite ways to keep jersey knit fabric from curling at the edges!
2. Design Properties for Successful Stretch Fabric Embroidery

The base embroidery stretch fabric has to support an embroidery design without the design curling in on itself, the fabric puckering, or the design distorting at edges.
The design size (both the number of stitches and the area it covers) and the stitch density are two important parameters to consider.
A well-digitized design for knit fabrics will also have a light layer of underlay to attach the fabric to the stabilizer before the more fill stitches are embroidered. (Here’s what underlay stitches are if you want to learn more!)
Small, low-density embroidery designs are effortless to embroider, whereas large, high-density designs with multiple color changes require more attention and finesse.
Also, the lighter weight and less stable the fabric, the less dense and smaller design it can accommodate. A thick, dense design can change the properties of a lightweight, drapey knit and affect how it looks when worn.

Now, if you have an embroidery program that edits designs based on fabric type (like my Hatch 3 software), you can use it to adjust designs for different types of knit fabrics.
Or, you can manually decrease stitch density by increasing stitch length slightly in large fill-stitch areas of a design to make a design more appropriate for some knits.
For designs with large fill areas that may affect how the outfit is worn or feels when folded or touched, you can also consider replacing them with applique. Be careful of using too wide or too dense of a satin stitch as the applique border, though.
Just remember, sublimation and heat transfer vinyl are other terrific options for personalizing shirts and other knit fabrics. Some designs just might not embroider well no matter what you do! (Learn more in embroidery vs. sublimation.)
3. Needle Selection
A 75/11 machine embroidery needle is a good starting point for embroidering on stretchy fabric.
While an embroidery needle has a slight ball point, sometimes actual ballpoint or stretch needles (which have more of a curve) can provide better results for very stretchy Spandex or Lycra fabrics.
This is because the rounded tip of ballpoint needles moves apart knitted fibers rather than piercing them as sharp needles would.
You can also adjust the needle size, if needed, based on the fabric weight.
A bigger number (like 80/12) means a thicker needle, which suits a thicker fabric. If you see needle holes at the edge of a design, while this can be due to too many needle penetrations in the design, this may also mean a smaller needle is required.
Thicker thread (30wt cotton thread, for example) may also need a bigger needle, and thinner thread (60wt) might benefit from a smaller (size 70/10 or 65/9 needle).
4. Thread Selection
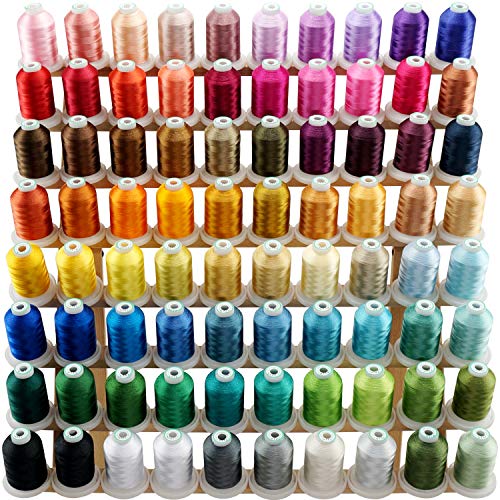
For synthetic stretch fabrics like polyester or Spandex, opt for synthetic threads like polyester or rayon. Using embroidery threads rather than sewing threads is important!
For natural fiber fabrics like 100% cotton jersey, cotton embroidery thread is a natural fiber option that keeps the garment’s soft feel. However, I rarely use cotton embroidery thread because of its duller sheen compared to polyester.
4. Hooping vs. Floating Stretchy Fabrics
Since movement during the embroidery process is a common reason for design puckering and design misalignment, it is VERY important the stabilizer and fabric do not move while stitching.

One way to prevent movement is to hoop your stretchy fabric (and the entire piece of stabilizer) rather than float it.
This is especially important for larger designs with a higher stitch count or higher stitch density.
When hooping, choose the smallest hoop that will work with the design to decrease the likelihood of shifting. Also, be careful not to overtighten the hoop’s tension screw. Too much tension can result in permanent marks on delicate fabrics.
It is crucial that fabric not be stretched while hooping, as once it’s unhooped, the unembroidered fabric will return to its unstretched shape, yet the embroidered area will not change shape. This results in distortion around the design.

An exception to this rule is something like a beanie (see how to embroider a beanie!) or tight leggings that will stretch when worn.
In this case, uniform stretch when hooping will keep the finished product looking proper when worn. (It might look a little wonky in its resting, unworn state, though, but you can’t win it all!)
Now, if you can’t hoop or don’t want to hoop the stretch fabric, at least use temporary fabric adhesive when floating, and consider a basting box to keep things from moving around.
Conclusion
Machine embroidering stretchy fabric isn’t one of the easiest embroidery projects for beginners. It requires more critical thinking about the parameters, but it’s definitely possible with trial and error!
Interested in some stretchy embroidery projects to try your hand at now? Check out my tutorials for how to embroider a t-shirt and how to embroider a sweatshirt!


