How to Cut Fabric with a Brother ScanNCut
This post may contain affiliate links, which means I’ll receive a commission if you purchase through my links, at no extra cost to you. I sometimes receive free products for review. Please read disclosure for more information.
Of the cutting machines I own, my Brother ScanNCut can do the most, but it was also the most difficult to learn to use.
First, the manual isn’t super detailed, and second, because the ScanNCut is not as popular as Cricut or Silhouette machines, online tutorials aren’t as plentiful.
However, thanks to trial and error, a few chats with Brother, and help from my local sewing shop, I finally learned the many ways to cut fabric with a Brother ScanNCut.
So, whether you want to cut quilt pieces, applique, or sewing pattern pieces for your next project, here’s everything you need to know about cutting fabric with a Brother ScanNCut machine.

Types of Fabric Projects Using a ScanNCut
First, here are some ideas for using your Brother ScanNCut with fabric to get your creative juices flowing.
1. Applique

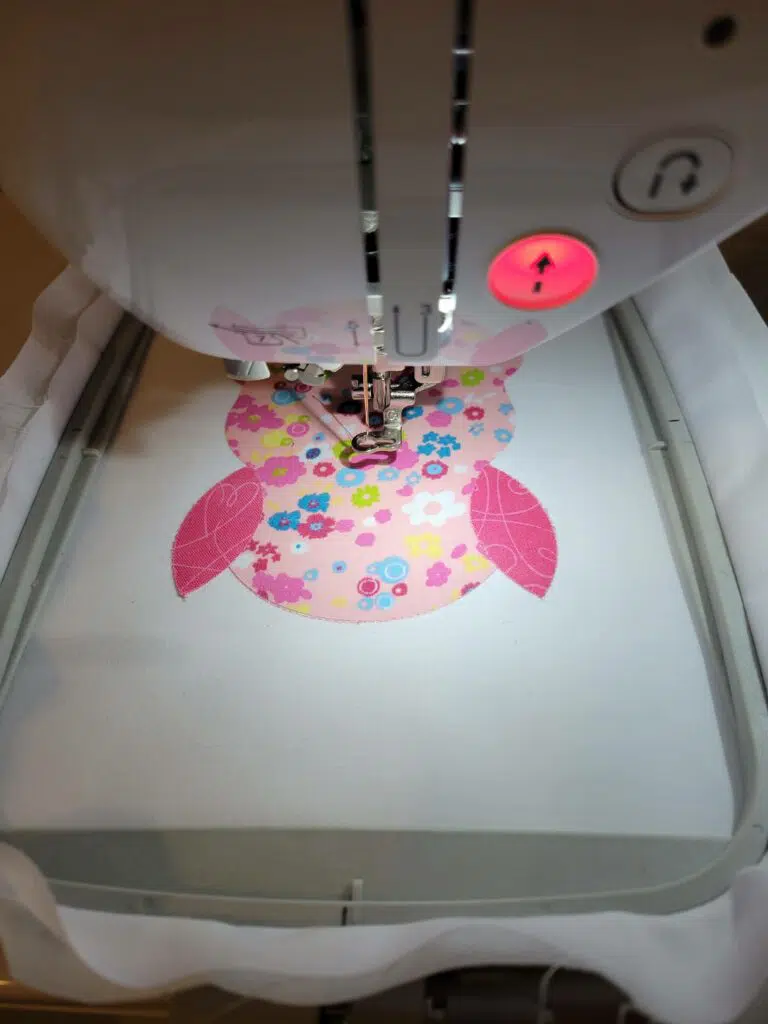
The Brother ScanNCut is an excellent helper in creating perfectly cut fabric for sewing or machine embroidery applique.
It can also precisely cut fabric for fused applique where edge-cutting imperfections are more frowned upon.
What’s fun is some ScanNCut models (like my Brother SDX330D) can also read embroidery machine files (.PES, for example) and work wirelessly with Brother embroidery machines.
2. Quilt Pieces

Many Brother ScanNCut machines have built-in quilt block designs. (Mine has 100+!)
And, many shapes that I’d rather cut by machine than hand (like a clamshell, Dresden, and apple core) are available in Canvas WorkSpace or as built-in designs.
Even if your machine doesn’t include blocks or shapes, you can scan in blocks you find online or create yourself.
Thanks to the scanning feature, you can also scan your fabric piece to fussy cut precisely the portion you want.
I also love that my Electric Quilt 8 software works easily with my ScanNCut in two ways:
- First, the Block Base+ software exports 4,000 blocks in SVG format, which I can then load to my machine.
- Any blocks I create myself in EQ8 software can be printed as a PDF and scanned to cut.
3. Pattern Pieces

If you have a scanning mat for your machine, you can scan in paper pattern pieces and direct your machine to cut the pattern out of fabric. (Printer paper patterns work better than thin store-bought patterns.)
While this method takes longer than scissors, it’s more accurate for intricate cuts and helpful for users with decreased dexterity.
4. Other Sewing Applications
You can also cut quilt piece templates, English Paper Piecing templates, and even free-motion quilting template stencils with a Brother ScanNCut.

Plus, if you use the water-soluble fabric pen, you can add sewing lines to fabric.
While CAPEN2 is Brother’s erasable blue and purple pen set, regular sewing marking pens will work if you purchase the Universal Pen Holder.

Combinations of Blades, Backings, and Mats That Work Together
There are many ways to cut fabric with a Brother ScanNCut DX.
I’ve quickly summarized the methods below, but keep reading after this section for supply explanations.
Cutting Backed Fabric (ex: Applique)
- Applique Contact Sheet + Standard Mat + Auto Blade
- Applique Contact Sheet + Low Tack Mat + Rotary Blade
Cutting Unbacked Fabric (ex: Quilt Pieces)
- Standard Mat with High Tack Support Sheet + Thin Fabric Auto Blade
- Fabric Mat + Thin Fabric Auto Blade
- Low Tack Mat + Rotary Fabric Blade
Types of ScanNCuts, Blades, and Mats (How This Affects Fabric Cutting)
You can cut fabric with Brother DX/SDX and CM models.
However, the CM relies on manual blade adjustment, whereas the SDX models are compatible with Brother Auto Blades.
Unfortunately, while all SDX models can work with all auto blades, different machines include different auto blades in the box. And who wants to pay more for a new blade if they may not need it?
Throw in the fact that Brother offers different mats (CM mats aren’t interchangeable with DX mats either), and you now should understand why there are so many workable (yet confusing to decipher) combinations of supplies.
All that to say, cutting fabric can seem confusing, but don’t worry!
Here’s the further explanation I promised.
ScanNCut Blades That Work for Fabric Cutting
Here’s an overview of blades relevant to fabric cutting, starting with the most basic blades and moving up.
1. Standard Machine Blade (CM Series Machines)
If you don’t have a machine with an auto blade, you’ll have to cut your fabric with manual blades.
2. Auto Blade (Standard Blade on DX Series)

The Auto Blade is included with Brother SDX cutting machines and can cut backed fabric.
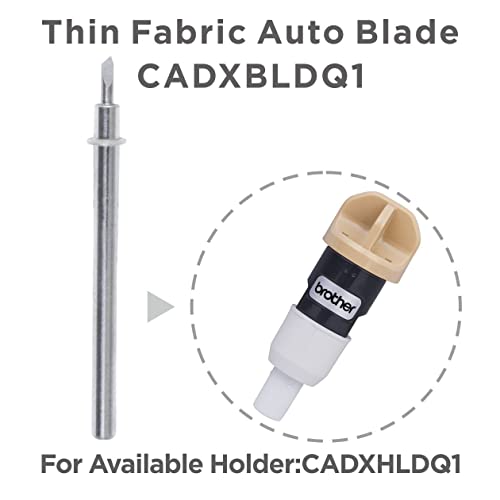
3. Thin Fabric Auto Blade (CADXBLDQ1)
The beauty of the thin fabric auto blade is you can cut fabric without backing like quilt pieces or sewing pattern pieces.
Unfortunately, you must purchase both the Thin Fabric Auto Blade and the Thin Fabric Holder, which gets pricey.
4. Rotary Auto Blade DX

The flagship ScanNCut fabric-cutting tool for DX machines is the Rotary Auto Blade. (You must purchase the whole kit to have the holder and the blade.)
While it makes most cutting a breeze, because the Rotary Blade has a bit more diameter, it doesn’t work as well for intricate cuts with sharp angles as the Thin Fabric Auto Blade.
Backing & High Tack Support Sheets Explained
Depending if you want to cut backed or unbacked fabric, the supplies you have on hand can make or break your cutting project.
Fabric Backing: Yes or No?

When I say backing, I basically mean putting permanent fusible web on the back of the fabric to add stability and decrease fraying at fabric edges.
Most applique works best with backing. And, backed fabric is the easiest fabric to cut.
While I back my embroidery applique fabric out of habit with HeatnBond Lite, most fusible webs will work.
For example, Brother recommends their Iron-On Fabric Applique Contact Sheet (CASTBL1) for non-textured fabric.
What A High Tack Support Sheet is Used For
In contrast, you don’t want to back quilt pieces or sewing pattern pieces, so cutting these requires different supplies and a different process.

Since you can’t use backing, you need a stickier mat to keep the fabric in place for cutting.
Enter Brother’s High Tack Adhesive Fabric Support Sheet (CASTBL2), which is applied directly to the Standard Mat to increase its tackiness and better hold fabric.
Mats That Work With Fabric Cutting

You probably already have the Standard Tack mat in your stash, which works for cutting backed fabric by itself or unbacked fabric when combined with a High Tack Support Sheet.

And, here’s the Low Tack mat, which works with the rotary blade.
Because the rotary blade rolls, it doesn’t produce as much drag on the fabric as toehr blades, so you don’t need as much stickiness to the mat.
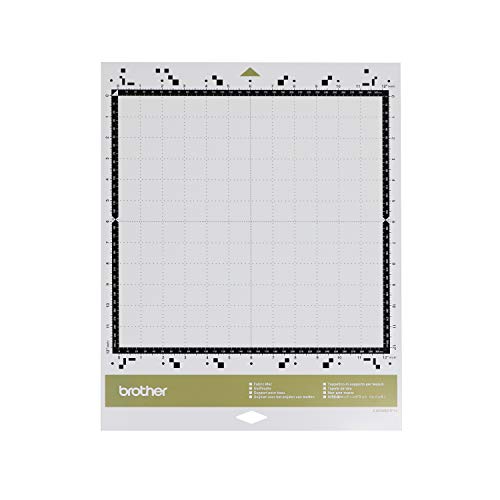
Another mat to consider is the ScanNCut Fabric Mat (CADXMATF12).
Think of the ScanNCut Fabric Mat (for DX machines) as the Standard Mat with a built-in High Tack Support sheet.
Thus, if cutting unbacked fabric with the Thin Fabric Auto Blade, you don’t need to add a support sheet to this mat.
How to Cut Applique Fabric on a Brother ScanNCut DX
Finally, now let’s get into some step-by-step instructions.
First, remember, backed fabric for applique can be cut with the Standard Mat and Auto Blade or the Low Tack Mat and Rotary Blade.
To cut applique fabric for quilting or machine embroidery, follow these steps.
1. Press Fabric

First, use an iron to press wrinkles out of the applique fabric.
I like using Best Press or another stiffener if the fabric is thin or low-quality. The more you can get your fabric to feel like paper, the better it will cut.
2. Adhere Backing

Place your backing rough, unpapered side down on the back of the fabric.
Then, use an iron to adhere the backing to the fabric.
3. Cut Fabric Roughly to Size and Remove Backing Paper

It also helps to cut the applique fabric roughly to size so you won’t waste backing or have difficulty placing your fabric on the mat later.

After the backed fabric has cooled, remove the paper backing from the iron-on sheet. This will leave a shiny backing layer on your fabric.
4. Apply Fabric to Mat

Use your fingers or a brayer to press the fabric with grain aligned onto your cutting mat. The backed side faces down on the mat.
I also like to extend my fabric over the thick black top and side cutting lines, as this decreases the likelihood of the wheels picking the fabric up when the machine moves the mat.
5. Load Design and Make Edits

Load your design, and make any edits before cutting.
Make sure Kiss Cut is turned off; that’s for half-cuts in vinyl or iron-on.
6. Start Cutting (Or Test First)

Next, load your mat into your machine and press Start.
If you’re using an Auto Blade, your blade will ideally cut perfectly the first time. However, it’s not the worst idea to do a test cut first.
7. Remove Fabric from Mat

Unload your mat, and peel off any unnecessary fabric with your fingers.

Then, carefully remove the fabric from the cutting mat with a small spatula.

And that’s it!

Fuse your applique according to the backing package’s directions and stitch the edges as desired.
How to Cut Quilt Pieces on a Brother ScanNCut

Quilt pieces are unbacked, and as mentioned earlier, three combinations of supplies work.
First, you can use the Low Tack Mat with the Rotary Blade. Or, you can use the Fabric Mat (or Standard Mat plus a High Tack Support Sheet) with the Thin Fabric Auto Blade.
I prefer using the Rotary Blade unless the fabric is a complex shape, although that’s much more likely for applique fabrics than quilt pieces.
The directions for cutting unbacked fabric are similar to backed fabric with these few differences.
- Make sure your seam allowances are included in your quilting patterns. If not, add them using your machine’s software.
- Adding steam can shrink fabric, so consistency when pressing is necessary.
- Removing unbacked quilting cotton from the mat requires more care and finesse to decrease stretch, fraying, and distortion. Especially if you used the support sheet or Fabric Mat.
- You’re more likely to have bubbling, so a brayer, credit card, ruler, spatula, or your fingers can help smooth fabric down.
- You can cut with either side of the fabric facing down, but place the right side down if you want to mark the wrong side of the fabric with a pen.
How to Use the High Tack Adhesive Support Sheet

Fabric support sheets have two layers: the sheet itself and the backing.
Place the transparent support sheet directly down over your Standard Tack Mat. The opaque backing will face up, and the transparent sheet will stick to the mat.

Then, peel off the exposed backing on the fabric support sheet. Treat the mat like you would any other mat now.
And, while the sheets only come in 12″x12″ sizes, you can add two pieces together for a 12″x24″ mat or cut smaller pieces if you don’t need to cover the entire mat area.
Notes About the Support Sheet
The support sheet is easily removed by peeling on the sides with a spatula and pulling with your fingers.
You can reuse the fabric support sheet as long as it remains sticky. Once you remove it, though, it’s almost impossible to smooth out and restick. So, keep this in mind and consider buying an extra mat for the sheet.
If the high tack sheet rolls up or peels off with the fabric when it’s not supposed to, restick your mat or replace it.
And that’s all I’ve got for now. I hope you enjoy using your Brother ScanNCut as a fabric cutting machine!


Thank you for all the great support
Thank you so very much. I just got my Scan N Cut a week ago and was totally lost. Now I know that I will be fine and will feel more comfortable exploring all it can do.