How to Remove Embroidery from Shirts, Hats, and More
This post may contain affiliate links, which means I’ll receive a commission if you purchase through my links, at no extra cost to you. I sometimes receive free products for review. Please read disclosure for more information.
Whether it’s because I stitched two sides of fabric together, used the wrong thread color, forgot to rotate the design, or even got a giant bird’s nest on the material, I’ve found many instances when I need to remove embroidery.
While this is not an easy task, thankfully, it’s not impossible in most cases.
Check out how to remove embroidery from shirts, hats, and other blanks using three different methods in this step-by-step guide!

Can You Remove Embroidery?
Yes, you can! However, removing embroidery, especially running stitch designs and designs or fonts with small motifs, is time-consuming. It takes patience and a steady hand as well.
And sometimes, embroidery blanks cannot be salvaged. For instance, non-forgiving fabrics like leather, velvet, vinyl, and cardstock retain permanent needle holes after embroidery is removed. Other delicate fabrics like thin jersey shirts, chiffon, and silk never look the same afterward either.
Since fixing embroidery mistakes is difficult, I always consider the price of a replacement blank vs. how much time I’d have to spend ripping machine embroidery stitches. In many cases, I choose to repurpose inexpensive blanks or embroider a patch or applique to cover the embroidery error rather than remove the embroidery.
Tools to Remove Embroidery from Shirts, Jackets, Hats, and More

Sometimes embroidery just needs to be removed. Like when I got married and changed my last name on my white coat. Or if you change jobs and need to remove a logo from a shirt.
And sometimes you just make mistakes when learning to use an embroidery machine.
One thing to remember is if you make a mistake in the middle of stitching and think it can be fixed, keep your fabric in your embroidery hoop while removing the embroidered area so you can then pick up embroidering where you left off. Rehooping is very difficult to get perfect results.
Now, I’ve tried many different ways to remove embroidery, and I’ll soon describe the three tools I like to use: a Stitch Eraser or Stitch Ripper, a seam ripper, or a household razor.

I also made a fun canvas test piece of embroidery to remove, put on a cheesy Hallmark Christmas movie, and timed how long it took to remove the canvas design as well as a design on a t-shirt.
Method 1: Stitch Eraser or Stitch Ripper
The easiest and best method to remove machine embroidery is with a specialized electric embroidery remover tool.
To remove the 5,000 stitches from the canvas, I spent 17 minutes compared to what would have been close to 45 minutes with just a seam ripper or other tool.
Electric removal tools differ from seam rippers because, instead of getting under the bobbin thread on the back of the embroidery and ripping it, they shave through the back of stitches so you can pull them away from the front.
Now, there are two common options that can be used for the embroidery removal process.
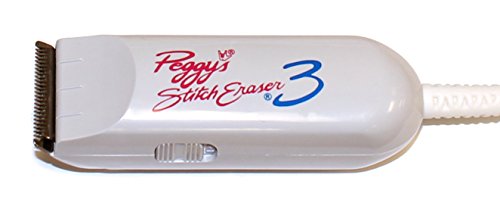
First, Peggy’s Stitch Eraser is the original tool made to remove embroidery and is shown above.
There are two types: the Stitch Eraser 3, which is the full-length 1.5″ corded razor, and the Stitch Eraser 9, which is a thinner 0.5″ cordless version for smaller areas and designs that require more precision.

Recently, DIME released its version, the Stitch Ripper Embroidery Repair Tool.

This is very similar to Peggy’s Stitch Eraser. However, I prefer it because, for a comparable price, it includes two sizes of razor blades (10mm and 40mm).
It also can be cordless or corded, which is huge when trying to maneuver into small spaces.
The biggest drawback of these embroidery removal tools when getting rid of unwanted embroidery is they aren’t perfect for every design.
Fill-stitch designs are easy to remove, but running stitch designs, narrow satin stitches, and areas of dense underlay are more difficult to get rid of and are sometimes better fit for seam ripping.
Here’s how to use them.
1. Start with the back first

First, use the stitch remover to gently shave the bobbin stitches off the back of the embroidery. The larger blade will shave more quickly, but the smaller one allows for more precision control.
If you have a bird’s nest, make sure to clip that with embroidery scissors first.
When shaving fill stitches, hold the tool right side up as shown for best results and work on a flat surface. Having the remover so the top and stitch blade top run along the fabric doesn’t work well.
Also, shaving with the blade perpendicular (but moving in the direction) of the fill stitches helps. However, you need a combination of movements to get everything up, especially underlay threads, which require more back-and-forth motion along the bobbin thread.
Pay special attention to the outlines of fill-stitch designs and any angled areas, which are also more difficult to remove.

Don’t apply too much pressure when shaving, as you can accidentally shave through your base fabric. This is especially true for thin T-shirts like the one above.

Removing tiny satin stitches like the text above requires placing the trimmer perpendicular to the stitches and moving back and forth and side to side to get everything.
Don’t even bother with running stitches (like in the word, “Please.”) These are much more easily removed with a seam ripper!
Keep shaving until it looks like you’ve removed most of the stray threads on the back of the fabric. Stop before you shave through your embroidery blank, though.
2. Pull Threads from the Front

Once you’ve razored most of the stitches on the back, use your fingers, tweezers, or even seam ripper to pull stitches away from the fabric front.
Unless you’re the most thorough shaver, all the stitches won’t be loose, and you’ll need to repeat the process. Pulling stitches that aren’t loose yet will cause larger holes in the fabric.
I prefer to use my fingers for the easy-to-remove stitches and then start with the seam ripper or tweezers to tease out any other loose threads.

After I’ve gotten all I can, I trim loose threads with a pair of scissors and then use a lint roller, duct tape, or contact paper to clean up the front and the back of the area so I can make another pass.

After each pass, keep repeating the stitch-shaving and thread-pulling process until you’ve removed everything you can easily.

At a certain point, you may need to get your seam ripper out to finish getting the last single stitches off.
Seam ripping from the front of the garment is sometimes easier because you can see the threads better from that view.

If you have trouble seeing the tiny stitches, you can get out a magnifying glass with light to help. I have the DIME Perfect Vision, which clips to the table and makes visualizing my work table much easier. (Check out other sewing aids for the visually impaired if you have problems seeing!)

I also like removing my embroidery with the backing stabilizer still on it!
After most stitches are removed, if you gently pull the stabilizer away from your blank, you can use it to isolate tiny stitches that didn’t get shaved with the razor and use a seam ripper to break them.
Method 2: Seam Ripper
For running stitch designs, I prefer to remove these with a seam ripper as it’s quicker.
Also, some embroidery blanks, like terry towels, require extra precision to avoid damaging the loops when removing the stitches, so you may need to rely on a seam ripper more than an embroidery removal tool here also.
Removing large fill-stitch embroidery designs with a seam ripper is a frustration of epic proportions, though, so opt for the Stitch Eraser or Stitch Ripper if you can.

To use a seam ripper to remove embroidery, place it perpendicularly underneath the bobbin stitches on the back of your embroidery blank. Be careful that you don’t accidentally poke through the fabric when seam ripping.
Try to remove every 3-4 stitches through the length of the embroidery design.
Then, repeat the same process as the above section for how to remove embroidery without a seam ripper. Rip, pull from the front, clean. Repeat.
Now, the amazing Lindee Goodall in a Craftsy class also recommends using a surgical seam ripper to shave off the stitches on the back. Or using a disposable razor for running stitch designs.
I’m just too accident-prone for any super sharp tools, but check out her video for more options!
Method 3: Household Razors or Trimmers
Since an embroidery eraser looks just like an electric hair-clipping razor, I tried my husband’s Wahl hair clipper and a women’s razor I purchased.
I’d seen some comparisons of the Stitch Eraser vs. Peanut Wahl, but I didn’t want to buy a completely new hair trimmer that we didn’t need since the dime tool works well! So, I tried his regular ol’ Wahl trimmer.
These two options worked just okay, and I don’t recommend the bikini razor but I do think the Wahl trimmer (specifically the Peanut) is a viable option if you don’t have the budget for a dedicated embroidery stitch remover tool.
Eliminating Fabric Holes After Stitch Removal

For forgiving fabrics like woven cotton where the needle only pressed apart fibers rather than damaged them, press your fabric with a steam iron to help close the small holes.
A gentle massage with your fingers over the holes can also help shrink the distorted areas back into place.
For more delicate fabrics that have permanent damage, your best bet is to cover it with new embroidery or an embroidered patch or applique.
Preventing Embroidery Mistakes
If you want to reduce mistakes, take precautions before stitching to ensure you don’t have to remove machine embroidery stitching.
- Monitor Your Machine: Don’t walk too far away from your embroidery machine, especially at the beginning of each color. If you can catch an error early, it’s much easier to fix than correcting an embroidery error after stitching the entire design.
- Consider a Test Stitch-Out: If you are trying a new design or technique on a new type of blank, make a test stitch-out first. This allows you to troubleshoot before embroidering on the real thing.
- Patches are Fool-Proof: Not sure you’re ready to embroider on your expensive leather jacket or a client’s brand-new hat? Consider embroidering a patch instead! Then, once you’ve made the perfect patch, you can stitch or iron it on your blank with no worries of messing up.
- Double-Check Machine Settings Before Starting: I have a checklist near my machine for when my brain is in distracted mom mode. Here are some of the reminders on it:
- Is there only one layer of fabric hooped, and is all the fabric out of the way of the presser foot?
- Is it the correct thread (color, type, wt) in the top and bobbin thread?
- Do I have the correct needle?
- Have I selected the right stabilizer, including using a layer of topping when necessary?
- Have I previewed the embroidered design location and made sure it’s oriented correctly?
Once I’m sure everything is good to go, then I press start, and this keeps me from needing to remove thread mistakes from my embroidery projects!