How to Thread a Singer Sewing Machine Easily (Pics+Video)
This post may contain affiliate links, which means I’ll receive a commission if you purchase through my links, at no extra cost to you. I sometimes receive free products for review. Please read disclosure for more information.
Learning how to thread a Singer sewing machine can be complicated, especially if you’re a beginner.
While you can find Singer sewing machine threading instructions in the instruction manual, quick-start guide, or on the sewing machine body, diagrams are sometimes confusing.
This tutorial specifically covers how to thread the upper thread, how to thread the bobbin, how to install a top-load or front-load bobbin, and how to raise the bobbin thread before starting to sew.

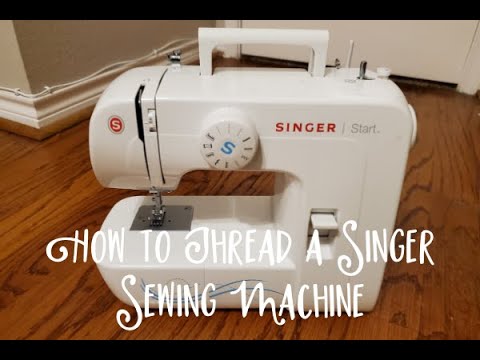
Video for How to Thread a Singer Sewing Machine
Now, before we start, here is a video I created showing how to thread a Singer sewing machine, specifically the 1304. My husband taped it, so sorry he’s shaky!
I also have a separate tutorial for threading a Singer heavy-duty sewing machine with pictures using my Singer 4452, which will be more helpful if you have a heavy-duty sewing machine.
How to Thread a Bobbin on a Singer Sewing Machine
The first step in threading a Singer sewing machine is to wind the bobbin on the top of the sewing machine.
Before starting, though, make sure you have a compatible bobbin for your sewing machine. In my case, this is a Class 15 clear plastic bobbin. (Check your user manual for details regarding your model.)

To start winding the bobbin, first, set your thread on the spool pin.
If your spool pin is horizontal, add an appropriately sized spool cap on top to keep the spool from coming off when sewing. For vertical spool pins, a spool cap is not as crucial if the spool is stable. Also, if your machine included spool pin felt (a small white donut-looking foam or felt piece), you can place this underneath the thread spool.
Next, pull the end of the thread and pass it through the first thread guide on the machine. The Singer 1304 image is shown above, and my Singer heavy-duty machine is shown below.

Next, wind your thread counterclockwise around the tension disc (below), which is a small circular piece of metal on your Singer sewing machine. Make sure the thread goes in between the tension discs. You might feel a little pop as the thread sinks between those discs.

Note: most newer Singer sewing machines have threading directions imprinted on the sewing machine body if you need extra guidance.

Then, pull the thread through the small circle in the bobbin top’s hole. Then, place the bobbin onto the bobbin spindle. It will pop into place and not move around anymore.

Push the bobbin spindle to the right. Then, hold the end of the thread and gently step on the foot controller or use the start button on a computerized machine.
The thread will start winding around the bobbin, and you can let go of the thread end after it starts working. After 10-15 windings, I like to stop the machine and cut the thread end before continuing the winding.
Once the bobbin gets close to full, it will slow down and stop. At this point, release the foot pedal or press the stop button.

Next, push the bobbin spool pin back to the left and cut the end of the thread. Remove the bobbin from the spool pin.
How to Insert the Bobbin on a Singer Sewing Machine
It’s now time to insert the wound bobbin on your Singer sewing machine.
There are two types of bobbins on most Singer sewing machines: top-load and front-load. The more basic mechanical Singer sewing machines feature a front-load bobbin. My Mom’s old Touchtronic and my Singer heavy-duty both have top-load bobbins.
First, for both types of bobbins, turn the power off on your machine, and raise the needle to its highest position. Do this using the handwheel (always turn towards you) or the needle up button on a computerized Singer sewing machine. Below is what your handwheel looks like.

Then, raise the presser foot to the up position.
Installing a Front-Load Bobbin on a Singer Sewing Machine
To access a front-load bobbin, remove the small accessories compartment on the machine, and pull open the hinged cover.

Then, find the small tab on the front of the bobbin case. Pull this towards you like you’re opening a soda can tab. Remove the bobbin case from the machine.

Then, hold the bobbin as you see above. I like to remember that the little metal “L” shape goes on the “Left” so it looks like the letter “L.” This “L” is called the bobbin finger.

Orient your threaded bobbin in your other hand as shown above with the thread wound clockwise. Then, insert the bobbin into the bobbin case.
Pull the thread through the small slit in the side of the bobbin case and then under the second slit below that. The two pictures below describe the process. Make sure to leave several inches of thread to work with outside the bobbin case.


Now, open the small tab on the bobbin case again, and reinsert the case with the finger of the case (the “L”) up in the air. I like to think of this as giving my front-load bobbin the finger because I’ve finally conquered this task, but that’s just how I remember it…

When inserting the bobbin, make sure to push it far enough before releasing the tab. If you remove your finger and the bobbin rotates around, try again.

A properly inserted bobbin will not move and will sit beautifully like above!
Lastly, close the cover of the compartment again and reinsert the extension table.
How to Install a Top-Load Bobbin on a Singer Sewing Machine
First, press the button near the bobbin cover to the right to open the cover. Next, remove the cover and simply drop your bobbin in. In terms of orientation, if you were to pull the thread, the bobbin would spin in a counterclockwise direction. Many top-load bobbin machines have directions on the base of your sewing machine for reference.
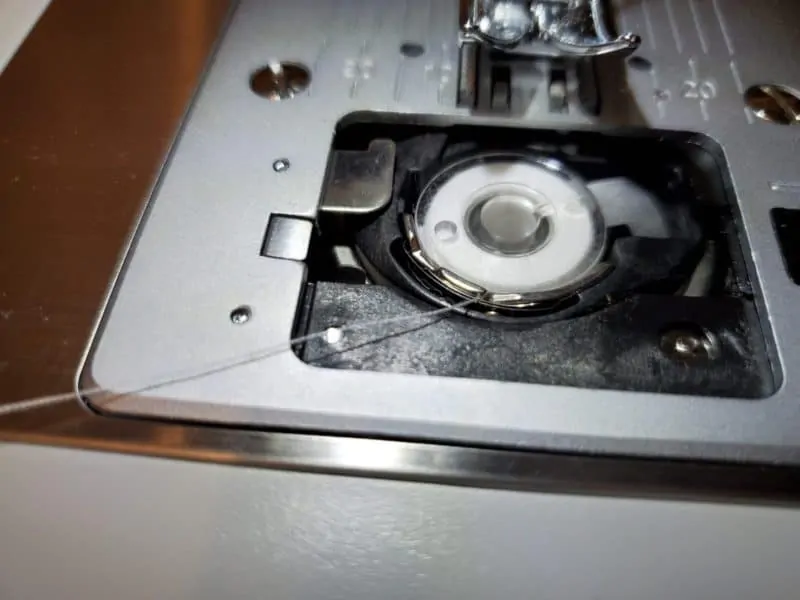
Next, pull the thread through the first slit in the bottom of the bobbin case.

Then, continue pulling it in a U-shape and underneath the second slit.

Pull the behind the presser foot, and replace the bobbin case cover. The left tab goes under the base again. The right side will click back into place.
How to Thread a Singer Sewing Machine Upper Thread
After completing bobbin winding and installation, it’s time to thread the top thread on your Singer sewing machine.
Ensure your sewing machine remains off, the needle is in the highest position, and your thread is still on the spool pin. Next, raise the presser foot if you haven’t already. (If you thread with the presser foot down, this messes with your sewing machine’s tension and results in poor stitch quality.)
Now, to start threading, pass the thread through the first thread guide like you did when first winding the bobbin.

Next, pass the thread around the second thread guide (below the tension discs you used for the bobbin.) Go under and then down towards you. Make sure the thread looks like the diagram does.

Pull the thread down the right channel on the front of the sewing machine.

Make a U at the bottom and run the thread up the left channel.
At the top is the take-up lever. Thread from right to left through the take-up lever. If your needle is not in the up position, the thread take-up lever may be too low to get the thread through.

Pull the thread back down towards the base of the sewing machine.

On the top of the workspace is a wire needle clamp guide. Pull the thread inside this. There should be an opening on the right or left side, depending on the machine.

Next, thread the needle from front to back if you’re threading by hand. I’ve made a post about threading a sewing machine needle easily if you’re looking for helpful tips!
How to Use the Singer Automatic Needle Threader
If there’s one thing I have learned about needle threaders, it’s that they’re delicate and temperamental. To use the automatic needle threader to thread the needle, here’s what to do.
First, lower the presser foot.

Then, lower the needle threader lever about halfway down using the associated threader. Hook the thread onto the guide, which is an upside-down, metal V-shape. The thread goes from the top right and under the V and then around the guide to your right. (As if you were threading counterclockwise.)
Then, lower the needle threader all the way down and rotate it towards you. You’ll see the hook pass through the eye of the needle. (If it doesn’t, you may need to adjust your needle height or centration.)

Inside the big hook in the eye of the needle, there’s a super tiny hook. I zoomed in as much as possible with my picture, so sorry if it is grainy! Now, pull your thread back into the big hook and catch it on the tiny hook. It helps catch the hook more easily if you run the thread along the back of the guide from bottom to top.

While still holding the end of the thread, rotate the needle threader back from the needle and allow it to return to its original position. As this is happening, the thread is pulled through the eye of the needle.
Raising the Bobbin Thread
You have to raise the bobbin thread for many Singer sewing machines before starting to sew.

While holding the upper thread, gently turn the handwheel (using your other hand) towards you to advance the needle down and then up. Pull the upper thread gently as the needle comes back up, thus drawing up the bobbin thread through the small hole in the needle plate.

Put both threads underneath and behind the presser foot.
You’ve now learned how to thread a Singer sewing machine! This includes threading the upper thread, threading the Singer bobbin, inserting the bobbin, and raising the bobbin thread. I know it may seem daunting at first, but once you’ve practiced, you’ll be a pro.
And, if you need help with differentiating thread types and brands, check out how to choose the best thread for a Singer sewing machine.
I appreciate this video. It was explained in a simple manner that I needed. Thank you so much