How To Embroider a Hat or Baseball Cap With a Machine
This post may contain affiliate links, which means I’ll receive a commission if you purchase through my links, at no extra cost to you. I sometimes receive free products for review. Please read disclosure for more information.
Thanks to the summer and my aversion to the sun, I’ve been embroidering hats and baseball caps like a fiend.
Since embroidering a curved hat using a flat embroidery hoop (for a single-needle machine) can be difficult, I put together this tutorial on how to embroider a hat to share what step-by-step process works best.
Because just knowing a few tips can get you stitching professional-level custom hats in no time!
Supplies Needed
Before we get started, here are the supplies you need to gather.
- Embroidery machine and hoop
- Plain hat
- Stabilizer: sticky self-adhesive stabilizer
- Needle: I used a 75/11 embroidery needle (If you have a thick hat, you may need a thicker, sharper needle.)
- Thread: Sturdy thread–I prefer polyester, but rayon or cotton embroidery thread work also.
- Pins
- Painter’s tape
- Marking materials
- Hat design
If you ever plan to wash your hat, I recommend first pre-washing to reduce shrinkage later. I use warm water with mild detergent.
Best Stabilizer for a Hat or Cap

I use tear-away stabilizer because it leaves no trace on the interior of the cap.
While I prefer self-adhesive sticky stabilizer (basically just tear-away stabilizer with one sticky side) for minimum mess and maximum success, there are other options.
You could choose a fusible tear-away, but take care with ironing it to the inside of the cap.
Or, you could use regular tear-away and a temporary fabric adhesive spray (like Odif 505). This isn’t my first choice, though, because there isn’t enough stick to get the cap adhered well, and it’s messier!
Lastly, if you plan to embroider knit hats, you may need to select a cut-away or no-show mesh stabilizer, which will prevent the hat from stretching and distorting during stitching.
Cap Embroidery Ideas
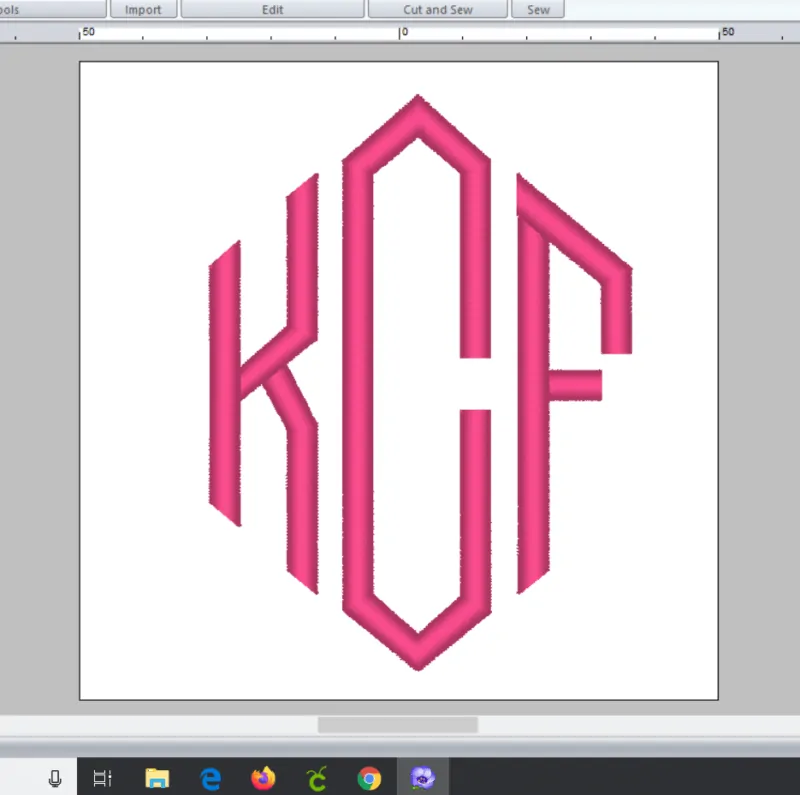
A monogram is one of my favorite things to embroider on a hat for women or kids.
I use my embroidery software to create simple monograms or appliques and then stitch fun hats.
I also like to embroider logos, characters, and even the occasional saying on hats. I’ve even embroidered hats with my daughter’s elementary school mascot on them!
Hats are also one of the best embroidery blanks to use with Puffy Foam.
Embroidery Design Limitations
Unfortunately, not all embroidery designs work on a baseball cap, especially if you only have a home embroidery machine.
For instance, too wide designs won’t fit on the front of a cap.
Even though there is a large area on the front of a cap just waiting for your embroidery, you need a margin between the inside of your hoop and your usable embroidery area. This is the space where you will pin your cap to the stabilizer.
Lastly, lightly stitched designs (like redwork) and small text get lost easily and have less room for error when stitching.
What part of a hat can be embroidered?
With a single-needle embroidery machine, you should be able to embroider on the front of the cap, the back of the hat, and even on the sides with creative hooping.
The bill of the hat, however, will be very difficult to embroider if the cap is already constructed and has thickness to its bill. Single-needle machines are not commercial embroidery machines and don’t have the motor to puncture thick, rigid hat bills.
This tutorial will focus on embroidering the front of the hat with my single-needle machine, as this is by far the most common location to embroider.
Choosing a Suitable Baseball Cap
There are so many types of baseball caps available!

Trucker hats are very thick and large and may be difficult to flatten adequately using a single-needle embroidery machine hoop.
If you have a center seam on a very thick hat, this is not the best choice of hat for a beginner to learn with.

A less rigid hat is the better choice. A more unstructured hat flattens more in your hoop, providing the best results.
I like the softer caps from Michaels and Hobby Lobby. I also prefer to buy my hats in person so I can touch them and determine the inside construction, for example, checking for laminated backing, which I avoid.
However, there are a lot of websites that sell hats specifically geared towards embroidery if you prefer to shop online.
Do You Need a Hat Hoop to Embroider On a Hat?

No, you can embroider a hat on a single-needle embroidery machine without a cap hoop!
My experience with my hat hoop (above) for my Brother SE625 was only okay. Using my regular hoop and stabilizing the cap with pins was just as easy.
However, I know some users swear by a cap hoop, so if you have problems with stitching your hats, try a specialized hoop!

One embroidery tool that is handy, though, is the DIME’s hat hoop clip, which helps flatten the cap’s bill.
The big downfall of this accessory, though, is you have to own a Snap Hoop Monster, which is pricy and not available for all models of embroidery machines.
How to Embroider A Hat Step-By-Step
1. First, decide where on the hat you want your design to go, and mark your hat.
To help determine design placement, I print my designs on paper, cut them out, and then preview them. Designs don’t have to be centered in the hat’s middle, so get creative!
2. Next, to keep from stitching over the flap behind the brim, use painter’s or masking tape to secure it out of the way.

3. Then, hoop a piece of sticky self-adhesive stabilizer.
The rougher part of the stabilizer goes on the bottom of the hoop, and the shiny side faces up. When hooping, make sure the stabilizer is taut and evenly hooped.

I’ve played with using Sticky Hoops and magnetic hoops when embroidering caps, and these can be helpful if you have difficulty adequately flattening the cap.
4. Next, score the stabilizer with a pin, and remove the backing layer.

You do this by gently running the sharp end of a sewing pin around the edge of the hooped stabilizer to separate the inside area from the outside.
Then, use your fingers to pull the inside backing off the stabilizer to expose the adhesive side. If you have difficulty getting it up, use the pin to help raise the backing. There’s no need to remove the backing perfectly–just ensure it’s gone from within your embroidery area.

It’s also helpful to mark the stabilizer’s center with a pencil to help you line up your hat better. With small embroidery hoops, you need all the space you can get.
5. Position your hat inside the hoop, lining it up the center of the stabilizer with the center of where your design will go. It doesn’t have to be perfect, as most embroidery machines allow you to rotate a design and move it around to line up with the center of your cap.
Flatten the cap as much as possible, pressing it evenly against the stabilizer. The center seam must be pressed flat! You may some distortion or lost stitches there, so minimizing this is important.
When positioning the hat, I place the bill facing toward me. If you face it toward the inside of your machine, it may bang up against the machine’s body when the carriage moves.
6. Because hats don’t want to lie flat and instead like to curve, I pin mine on all four sides to keep them stable during embroidery.
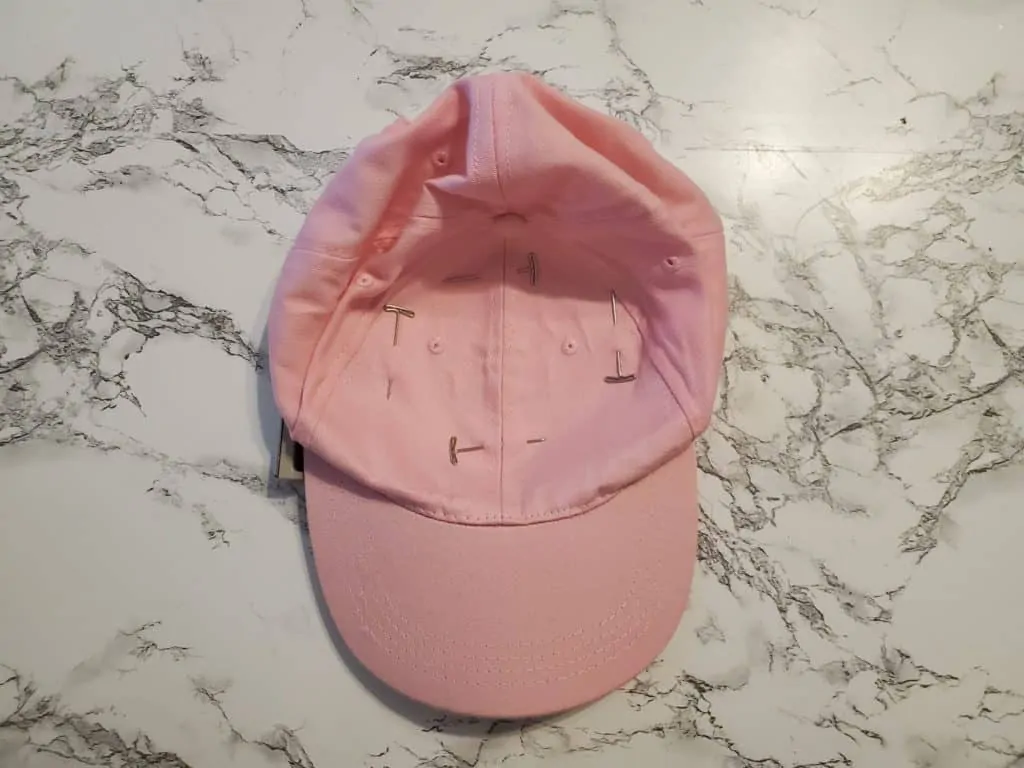
I’m using T-pins here (that I’ve manually bent a little with my fingers) here because they don’t bend easily when stuck into the hat.

Sometimes I use regular straight pins too if the hat is less finicky and doesn’t keep trying to raise off the stabilizer.
You can try any long, straight pin or safety pin. I’ve never had them leave a permanent hole in my hats, but test the pin before pinning all four quadrants!
The most important thing is to ensure the pins are NOT inside the embroidery area as the last thing you want to do is embroider over them and break a needle.
7. Next, place your hoop on your embroidery arm. Line up your design loaded onto your machine with where you marked your baseball cap.

If your cap is not aligned with the bill down, don’t forget to rotate your design to match!

My preference when embroidering new materials is to decrease embroidery speed until I ensure everything works out.
8. Finally, press start, and watch your machine embroider your hat!
When done, remove the hoop and release the stabilizer and hat. Then, gently tear the stabilizer off from the design.

Clip any jump stitches, remove the painter’s tape from the flap, and reshape your hat to its original look.
If you used a water-soluble marking pen, gently dab with warm water to remove the ink on your finished product.
If the back side of the design is scratchy on the wearer’s forehead, you can fix this by adding embroidery backing like Sulky’s Tender Touch.

Single-Needle vs. Multi-Needle Machine: Notes
I own two embroidery machines right now–the Brother SE1900 combo machine and the Brother Luminaire XP2–and this tutorial is for cap embroidery using a single-needle embroidery machine.
While my machines can use a 5″x7″ hoop, I used to have a Brother SE625 sewing and embroidery machine with a 4″x4″ hoop. This embroidery method will work for this machine and most other small embroidery machines, too.
A single-needle machine is not the most time-efficient or easiest way to embroider hats in bulk, though.
If you hope to start a home embroidery business and embroider hats in bulk, multi-needle embroidery machines (specifically commercial ones) with specialized cap frames are the way to go.
And, as a note for you embroiderers looking to profit, embroidering on hats has a sizeable profit margin. Hat blanks are inexpensive, and embroidered hats sell for high prices!
I hope you enjoyed learning how to embroider a hat with your embroidery machine–now you can enjoy sun protection in style!
Thank you for the tips on how to embroider baseball caps. I have a Brother Innov-is NV990D and am looking forward to trying this.
Hope everything goes well with your stitch out!
This is great. I’ve been contemplating doing a few hats but didn’t want to buy the special hoop. Thank you. I do have a question. You say you slow the speed down when you first do a design. How do you do that on the Brother SE625?
Thank you so much. I really didn’t want to buy the special hoop. How do you turn the speed of the Brother SE625 down?
On the right of the machine below the touchscreen, click on the settings icon (it looks like a paper with bullet points on it). Then press the right arrow until you see a “Max Embroidery Speed” setting. Go ahead and touch the minus sign, and this will decrease the speed. After you’re done embroidering your hat, don’t forget to increase it again for your other projects!
Excelente!! Muy bién explicado y muy fácil de entender. Muchas felicidades!! Gracias por su aporte a las personas que nos gusta bordar. Saludos!!
My hat has the plastic air holes or grommets, like yours. Does the embroidery machine sew through them?
My machine has no problems sewing right through them! Depending on the part of the design that I’m stitching over the holes, though, I sometimes stick a small piece of same-color fabric behind to have something for the stitches to grab on to and stay on after the stabilizer is removed.
Hi, I do not know how to sew at all but am interested in learning how to embroider hats for my husband. The person we knew past away and there is no longer anyone available. Is this a difficult task.
Hats are one of the most difficult things to embroider on a single needle embroidery machine. If you purchase a multi needle machine with a cap driver, the process is much more manageable!
Can you use the baby lock pathfinder to embroidery on hats?Thank you
Yes, you can. While not as easy to accomplish as with a multi-needle machine, using your Pathfinder should be no problem.
I purchased a baseball hat with the name of my cruise ship on the front. Now I have this idea to add the other ship names that I have sailed to this hat…continuing around the hat on the same level/position, font, size n color just a space or two between each name. Can this be done?
Do you have a single needle or multi needle machine?
Neither I just wanted to know if my idea was possible before I invested or tried to find a shop.
Ok! I recommend a multi-needle machine if you plan to embroider all around the hat. However, to create your vision with an exact match, you will need to know the font and size used in the original logo so you can add the other names of the cruise ships around the hat. If you don’t know this information, you can see if you can find a similar looking font online and estimate what size you need, but it might not be a perfect match in font.
How close to the hat brim can you embroidery?
It varies depending on what type of machine and hooping set-up you have.