How to Digitize Photos For Embroidery (Tutorial)
This post may contain affiliate links, which means I’ll receive a commission if you purchase through my links, at no extra cost to you. I sometimes receive free products for review. Please read disclosure for more information.
If you’re not a digitizer extraordinaire, manually turning a photograph of a person, pet, or place into a machine embroidery design can be very difficult. It would mean plotting out every stitch in a photo by yourself and picking exact thread colors to provide visual depth.
While digitizing simple images (like single-color logos) is easy, photos are so intricate that beginners may need help converting the photo to an embroidery design.
For example, when first learning to digitize, I challenged myself to digitize a picture of my daughter’s face manually. It took 3 hours, and it resembled her only if you squinted and blurred your eyes.
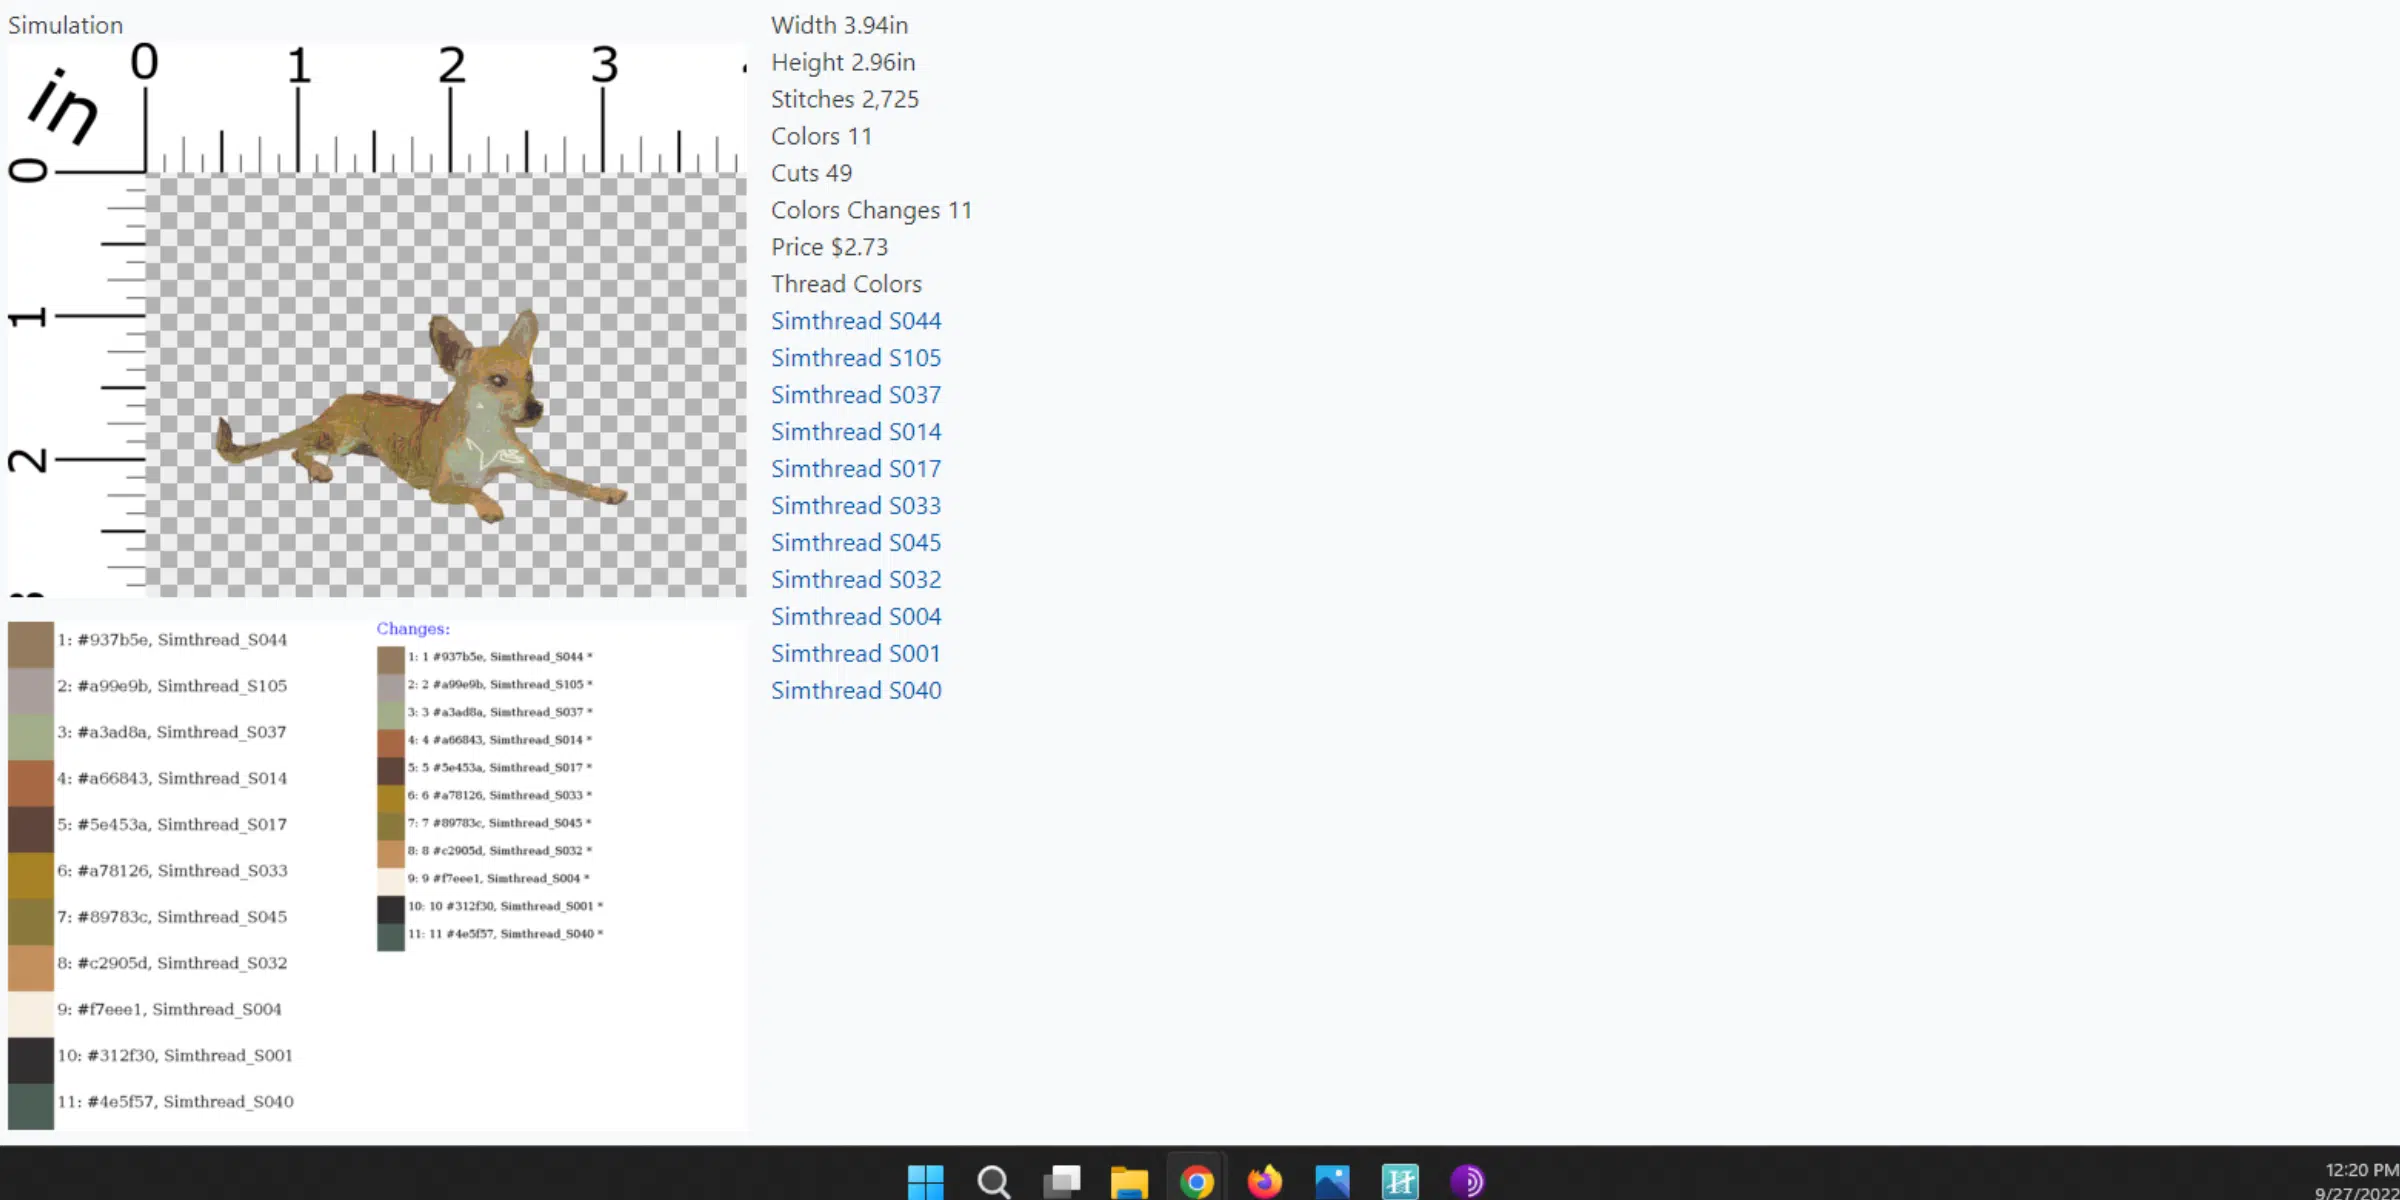
Thankfully, there are many ways to digitize a photo for embroidery that harness the power of technology and make it so you don’t have to do everything by yourself! Check out this tutorial where I digitize a photo of my grandmother’s dog, Chance, as an example!

Three Ways to Digitize a Photo
If you want to create an embroidery design from a photo, you can do it yourself two different ways or have someone else do it for you. Here are the methods explained in more detail.
1. Use Embroidery Software to Create the Design Yourself
If you upload a digital photograph to a compatible embroidery software, all you have to do is select the photo to embroidery design feature, adjust parameters, if desired, and watch the software digitize the photo for you.
This type of auto-digitizing is not always perfect, and you will likely need to edit some stitches and adjust the number of colors if you’re using a limited thread palette. However, you’d be surprised how brilliant and effective digitizing software is!
You can also use software to manually create a photo embroidery design stitch by stitch. I don’t recommend this unless you have digitizing experience already, though.
2. Use Machine Software to Digitize the Picture

If your photo is not involved and you own a top-of-the-line embroidery machine, you may be able to use your machine to convert the picture to an embroidery design with minimal input from you.
I own a top-of-the-line Brother Luminaire, which allows you to scan in or upload a picture and create an embroidery design using Design Center. This type of digitizing has many limitations, and I prefer software.
However, if you don’t want to purchase software after spending a ton on an embroidery machine, check your user manual to see if you can harness any built-in machine digitizing capabilities.
3. Hire a Professional Digitizer
Maybe you don’t have a computer or don’t want software. In that case, I recommend hiring a digitizing service to digitize your image for you. Depending on the complexity of the photo, you could have this done for as little as $10-$20 and within the day.
Premium Embroidery Software with a Photo Stitch Option
Now, here’s a short, non-exhaustive list of some of the big embroidery software players with automated Photo Stitch or equivalent capabilities.
Most are pricey, but many have free trials!
1. Hatch 3 Digitizer, Janome Artistic Digitizer, and Bernina DesignerPlus

Hatch Embroidery 3 is the Wilcom embroidery digitizing program that I use and love. I’ll give you a tutorial in a moment.
Two other programs associated with Wilcom that mimic Hatch’s user interface are Bernina DesignerPlus software, which has its version of Color PhotoStitch, and Janome Artistic Digitizer, which has PaintStitch.
2. Stitched Snapshots Plus
DIME’s Stitched Snapshots Plus is an add-on to their full-fledged embroidery software, but it can also stand alone.
It’s also one of the more inexpensive ways to transform photographs into embroidery designs.
3. Sierra Stitch Era

If you only want to digitize a few photos, Sierra Stitch Era software has a super affordable monthly subscription option–a huge cost-saver for infrequent software enthusiasts.
4. Sfumato Stitch Plug-In

Associated with Embird software, the Sfumato Stitch plug-in lets users import a photograph to create a photo-stitch.
The process is not as “automatic” as in other programs, requiring more user input to create a realistic stitch out.
5. Brother PE Design 11 and Baby Lock’s Palette 11

These two software also contain an automatic PhotoStitch feature.
Digitizing a Photo for Embroidery for FREE
Unfortunately, unless you phone a friend with software, turning a photograph into an embroidery design for free is difficult.
The only free embroidery digitizing software I’m aware of that supports complicated digitizing is the open-source Inkscape with the Ink/Stitch embroidery extension.
However, it doesn’t have auto-digitizing capabilities nor an easy way to click and have a photo digitized. So, you’d have to learn to use the program and create the embroidery design yourself.
If you’re a vector graphics fan, this may be a fun challenge! If not, you’re likely to be frustrated.

I would also be remiss if I didn’t mention photoembroidery.com, a free-ish software in the sense that you can upload and view a digitized photo, but you then have to purchase the embroidery stitch file at $1.00/1000 stitches if you want to download the design.
The one caveat is the maximum embroidery design size that can be created is 10cm x 10cm. I also couldn’t figure out how to preview a design to see if it was a good-quality stitch-out.
The photo I tried converting of Chance just looked a little weird on my computer screen.

How to Digitize a Photo for Embroidery
Here’s a quick tutorial using Hatch 3 Digitizer to show you how easy it is to turn a photo into an embroidery design with the right software!
1. Select a Good Photo
While vector-based images (SVG files, Adobe Illustrator files, etc.) are easiest to digitize and have the highest image quality, it’s likely that your picture is a PNG file or JPG file. Don’t sweat it.
However, not all photos lend themselves to a good-quality embroidery design and stitch out. Here are some things to keep in mind.
A. Crop Before Digitizing
Crop your photo first so you only have to worry about digitizing the focus area. The photo will digitize faster, and any max thread color limits you’ve placed can go toward the main focus of the photo, not any awkward background.
B. Aim for Good Background Contrast

In the above picture, Chance and the couch are similar colors.

Thus, when creating an embroidery design using this photo with its background, you can barely see the poor little fellow.
Not to mention, you’d need a whole lot of threads of just slightly different shades to get the final stitch out to look good enough.
C. Consider Removing the Background

Not a fan of the picture background? Remove it and create a transparent background.
I love using Canva Pro to remove backgrounds from my photographs. There are also many free background removers out there, too.
While some embroidery software (and my embroidery machine) have built-in background-removing features, I prefer to remove the background before importing so I can also make any touch-ups.
D. Size Matters for Resolution and Quality
Larger designs take longer to render, but the details are often clearer. So, choose a good-resolution photo and select a reasonable size for your embroidery design.
2. Add Photo to Embroidery Software

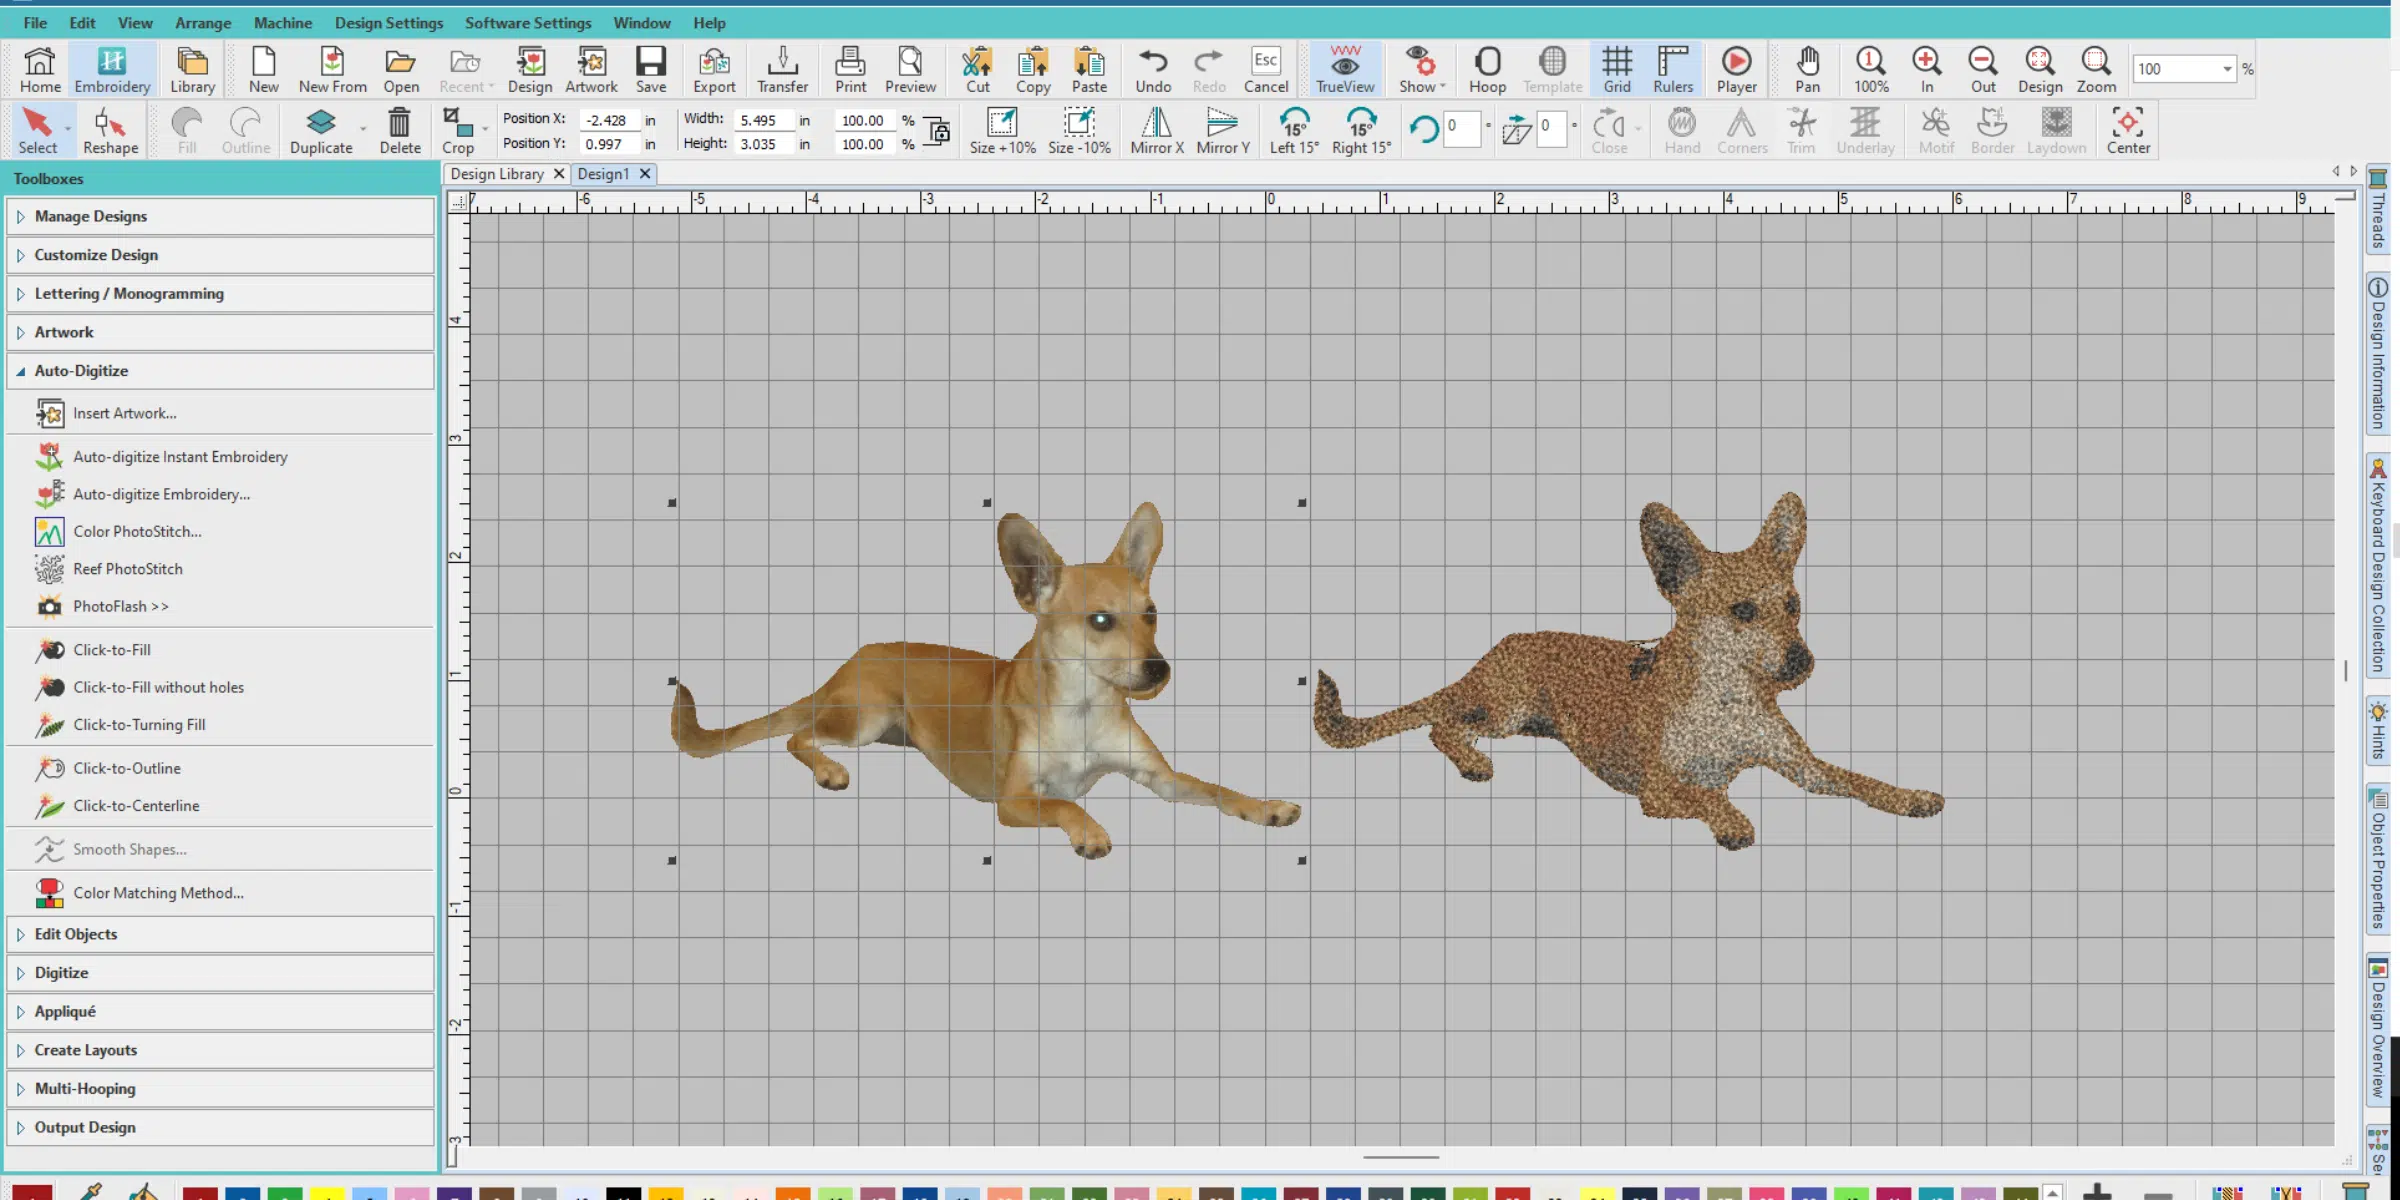
The next step is to add your photograph to your embroidery software canvas. Click Insert Artwork to do this.
Then, resize the picture to the design size you want before rendering with the PhotoStitch features.
3. Click to Photo Stitch and Set Parameters

In Hatch, under Auto-Digitize on the left, click Color PhotoStitch, which brings up the above settings box.
Adjust parameters as needed. The best way to figure out what they all do is to choose a simple photo and start playing with them to see how the final design changes.
After setting the correct parameters, click “OK,” and your design will render!
4. Edit Design, If Needed

Next, change thread colors to match your thread supply (you can add custom thread charts), and edit out any odd stitches.
I had to delete a few stitches between his back leg and tail and on his back in this instance.
5. Export Design
Last, export the design in your machine file format. For my Brother embroidery machine, I use PES embroidery files. The DST format will work for all machines, but just know this embroidery file type doesn’t contain information about the thread colors you chose.
You can then transfer your embroidery design to your machine via WiFi, USB, etc.
Tips for Stitching Out Photo Embroidery Designs

These suckers are typically stitch-dense designs and won’t stitch out well on just anything. You will get your best stitch-outs if you use woven, non-stretchy fabric.
Adding a layer of interfacing to the back of the fabric and/or adding starch, Best Press, or your favorite fabric thickening agent will also decrease the risk of puckering. Also, consider using a layer of cut-away stabilizer (or no-show mesh, but I have the best results with two layers) to support the stitches and protect stitch integrity.
I also like adding basting boxes and hooping fabric when possible to prevent movement during embroidery.
Of course, you can embroider a photo design on a stretchy embroidery blank, but just make sure to hoop/float and stabilize well.
Lastly, try using your embroidery program’s Auto Fabric function to tailor the design’s properties to your fabric. This way, the design is less likely to affect how the fabric hangs and flows after it’s stitched.

As you can see above, I made this photo embroidery design of my grandmother’s dog into a little pillow for her.
She’s in her 90s and loves this dog so much, so I hope she’ll appreciate this embroidered gift.
I hope you now understand more about what’s required to digitize a photo for embroidery and can decide the best path for turning your photographs into unique designs!

I love your tutorials. Thank you for taking the time to educate me. My machine is older but an upgrade will wait as I process and plan, ultimately leading to digitizing my photos into embroidery designs. 🙂
Thanks. Best wishes for your processing and planning!
Thank you
I am still a little confused when it comes to converting a phote to an embroidery pattern.
What specifically do you not understand?
Thank you for all your info ! Since my Palette 11 key has been stollen or lost I needed to find an economical way to stitch out designs. You have helped. Now to see what BabyLock will do for me